Introduction
Like thousands of other owners, we love sharing pictures and short videos of our bunnies on Instagram (you can find our Instagram feed here). Recently, someone asked us in our comments how we got the photo heading this article. Whilst we’re not professionals, we take a lot of photographs (not just of bunnies!). So we thought we’d pass on what we’ve learnt – what works for us in photographing rabbits.
Read on if you want to get some great pictures for Instagram, or perhaps you want to create a cushion or mug proudly showing off your pet rabbit. Or order a gigantic print for the wall!
These simple tips will show you how to photograph your rabbit and create fantastic, memorable images.
Get closer
This is probably the most important tip of all. Robert Capa, the famous photojournalist, said, ‘if your photographs aren’t good enough, you’re not close enough’. It’s good advice for most pictures. Photographs of your bunny are no exception.
Look at this first example, where I’m not close enough:
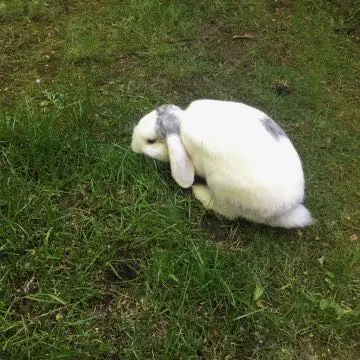
Even zooming in a bit improves it – still not great, but better.
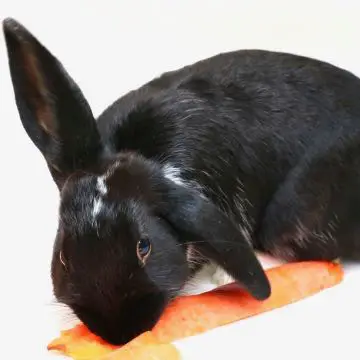
Get close – fill the frame with your bunny, so you can see the whiskers on their face. Then get a bit closer.
Get low
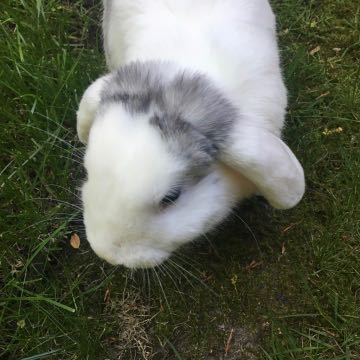
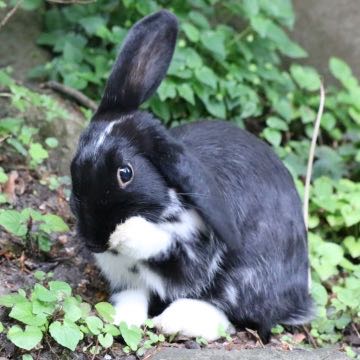
Come down to your rabbit’s level – you’ll often get a much better picture.
Look at the difference between the photo above and this one (only taken seconds apart) – the first taken from above, the second from bunny’s eye level.
The quickest way is to kneel or lie down to get your picture. Or just try holding your smartphone down low. If you’re using a DSLR or mirrorless camera, some of them have flip screens that make taking pictures from low angles easier.
If the ground is muddy or very hard, it can put you off kneeling down or become uncomfortable. One small tip is to use a foam camping mat to kneel on (you can also get similar mats for gardeners). You can pick one up from Amazon UK or Amazon US – I just use a cheap one, but they will happily sell you more luxury versions.
Having that extra bit of comfort helps you stay in position to get the best shot of your bunny.
Think about the background
We can be so besotted with our bunnies that all our attention is on them when we’re taking the photograph, and not realise how distracting the background can be. There’s a number of ways that we can help make sure that all eyes are on our rabbits.
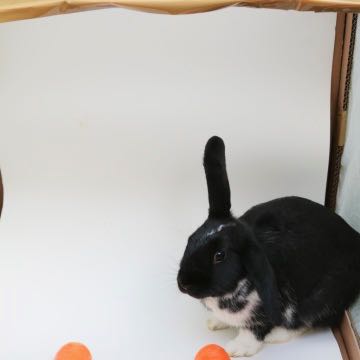
Look how distracting this photo is (too small, taken from above, and look at all the distracting stuff around Fish):
Go for a simple background
If possible, go for a simple background. It’s not always possible if you’re just grabbing a shot as your bun is hopping around, but having a plain, unfussy background helps your rabbit to stand out in your snaps.
Blur the background
One way to create a simpler background is to make it more blurry (people into photography call this bokeh).
It’s easier to do this with a DSLR or mirrorless camera than with a smartphone – the smaller sensor size of the smartphone means that more is in focus at all distances. With a larger camera, you can use a large aperture (small f number) so that only the subject is in focus, and everything at other distances is blurry (but see later for how this makes focusing on the eyes harder…).
To do this, choose ‘aperture priority’ mode. Here’s how (often on a dial on top):
- Canon: choose the ‘Av’ mode. Then choose the f number you want (usually a wheel or similar you can rotate to choose)
- Nikon: choose ‘A’ mode. Then choose the f number you want.
- Sony: choose ‘A’ mode. Then choose the f number you want.
- Fuji: rotate the aperture dial on the lens to the f number you want.
As smartphones develop, some allow you to create this background blur digitally. If you have a smartphone that can do this, play with the setting to see if you prefer the results.
Create contrast with the background
Sometimes, you have the chance to choose the background (perhaps you’re taking a photograph indoors, and can throw a sheet onto a chair or sofa for an impromptu photoshoot).
Think about what will help your rabbit to stand out.
If your rabbit has dark fur, choose a pale background. If your rabbit has pale fur, choose a dark background. When we took this picture of Chips, we deliberately chose a white background:
What if you have two bunnies? We find this difficult, as Fish has pale fur and Chips has dark fur, so when they are together we just do the best we can!
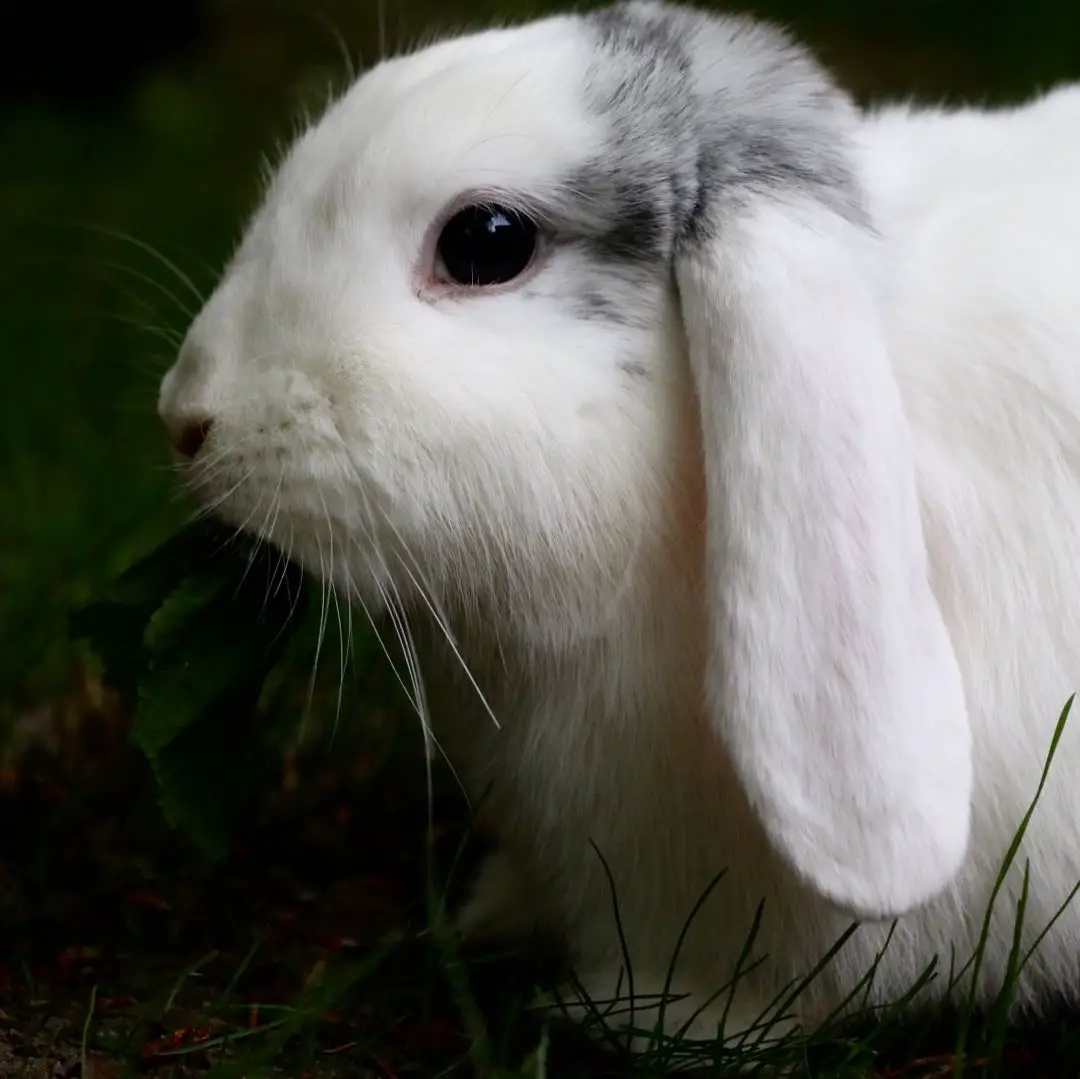
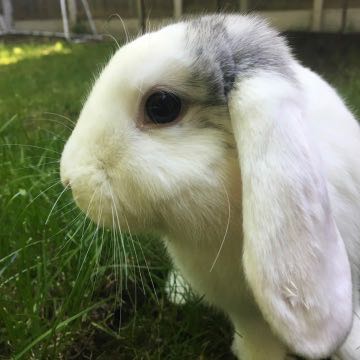
Focus on the eyes
The eyes are the window to the soul, says a traditional proverb. It’s certainly true that we look at eyes first – they grab our attention. What does this mean for our photographs?
You need to make sure that your bunny’s eyes are in sharp focus.
How do you do this? It depends on what type of camera you are using.
Using a smartphone
If you are using a smartphone, lots of any picture is normally in focus (it has large depth of field – this comes from the physics of using a small sensor).
What this means in practice is that you probably don’t have to worry too much. But if your bunny is fairly still, you can usually touch on the screen to show your phone where you want to make sure is in focus (I do this when using my iPhone).
Using a DSLR or mirrorless camera
If you are using a larger camera, such as a DSLR or a mirrorless camera, then your photos will usually have less depth of field (the larger the sensor, the less the depth of field).
The advantage is that you can more easily blur out a distracting background. But it also makes it much easier to miss focus on the eye.
One solution is to use a smaller aperture (a higher f stop) – using f8 or f11 or higher will give more depth of field, and so more chance that the eye is in focus. See above for how to choose an aperture (an f number).
Another solution is to carefully lock focus on your bunny’s eye. Different cameras do this in different ways. Some cameras (such as the Sony A9 and Sony A7RIII – available here on Amazon UK or Amazon US) now even have eye tracking autofocus – once locked on, it will keep focus on the eye even as your rabbit moves around.
My camera doesn’t have this eye tracking, so I try to lock focus and take lots of shots to make sure that I get some with the eye perfectly sharp.
Eyes and rabbits with dark fur
But there’s another issue with eyes – particularly if you have a bunny with dark fur. When I photograph Chips, the fur around her eyes is black. And her eyes are dark. It’s very easy for the eye not to stand out.
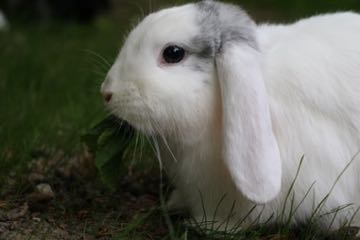
In contrast Fish has pale fur, so her dark eyes always stand out.
To counter this, try to make sure, if photographing a dark rabbit, that you get a catchlight in their eye. The catchlight is a little reflection of light that you can see even in dark eyes. If you do this, the person looking at your photo can still easily find the eye.
Look at this photo of Chips – notice how there is some white reflected in her eye. That’s the catchlight.
So two things to remember – get the eye in focus, and make sure it stands out against the fur in some way.
How will you use your photograph?
When taking the photo, also think about what you might use it for. This matters because it helps you think about how to frame the photograph.
If you’re taking photos for Instagram, chances are you want a square format. If you’re using a smartphone, change to a square setting before taking the picture.
If you’re using a DSLR or mirrorless, you’ll need to crop after you’ve taken the picture. But think about which bits you’ll crop away before you take the picture.
This way, you’ll make sure that you get exactly what you want in the frame, and that you haven’t cut off a nose or an ear. But think about what shape the photo needs to be.
Think about perspective
Think about how close physically you want to be to your bunny to take the photograph. There are two ways to ‘get close’ and fill the frame with your rabbit.
The first way is simply to be very close. This will exaggerate whatever is closest to the lens, and make everything else seem smaller. So the nose and whiskers might become really prominent.
This is similar to what happens when we take selfies – if we take them really close, our nose looks bigger and our face seems a little out of proportion.
The second way is to be further away, but to zoom in. The best way of doing this is with a lens. Some smartphones now have two lenses, and can do this.
If you have a DSLR or mirrorless, then you can use a telephoto lens. If you can’t do either of these, then you can crop the photo later, but you risk losing some quality.
What’s the best light outdoors?
Many people might think that a bright sunny day is the best light for photos. We find it’s easier on cloudy days (in Manchester, we get a lot of these).
Taking pictures in bright sunlight means a lot of contrast – pale fur gleams white in the picture, with dark, black shadows. The softer light on cloudy days is less harsh, and you can see the delicate fur more easily.
But what if it is a sunny day when you’re taking your photos? If you can, find some shade. Shade light is also soft, like a cloudy day. Or you can make your own – get a friend to hold up a blanket.
Usually, it’s easier to have the light coming generally from behind you. But don’t be afraid to try taking pictures into the light as well – you may find that you get some fantastic images of how fluffy they are as their fur is backlit by the sun.
What’s the best light indoors?
Usually, the best light indoors is near a window (but not in direct sunlight). Of course you can use whatever lights your room has, but, if you can, try to use the natural daylight coming in through a window.
Try not to use flash unless you need to – you’ll end up with a flatter looking result, and sometimes you get strange reflections in the eyes. It can also sometimes lead to strange colours.
How to get a smooth background
Occasionally, we want a plain background that all appears to be one colour (in photography, this is called an ‘infinity’ background.
It’s surprisingly easy to make one.
You just need a large sheet of thick paper. I have one white sheet, and one black sheet.
Stick up one end about 30-40cm high, and unroll the paper towards you (you might need to weigh down the corners near you so it doesn’t roll up.
Now you ‘simply’ need to make sure your bunny is on the sheet of paper.
Here’s a photo of Chips on the roll of paper – it was used for the earlier photo of her on a white background.
Be careful – your bunnies may find the paper slippy. Unlike dogs and cats, bunnies don’t have paws, but just furry pads on their feet. So make sure that you’re not doing this somewhere where they could slip and fall.
Things that help
Some things just make life easier.
Having a friend to help as a ‘bunny wrangler’ makes life easier – they can help make sure that the bunnies are roughly where they should be, while you can concentrate on taking the pictures.
Don’t forget treats – they can help keep your rabbit happily in the same place (if you’re taking a photo of someone else’s rabbits, make sure that they are happy with the treat you’re offering.
Good treats might be a few pellets, or some herbs. (See here for our guide on what herbs are safe for rabbits.)
Squeaky toys can help make sure your rabbit is looking in a certain direction. If they aren’t lops, this can help bring the ears forward, which tends to look better in photos.
In fact, photos of your bunnies playing with toys are also a great idea. We have our own favourite toys – see our article here.
Don’t forget
- Take lots of shots
- Keep photo sessions short
- Keep your rabbits safe and happy throughout
And not every photo posted to Instagram has to be a masterpiece. Sometimes we post ordinary snaps for fun!
An example
Here’s how we got the shot heading up the page (it was a casual shot in the garden, not a special photoshoot). Here’s how it came out of the camera:
- I got close
- I got down low
- I focused on the eye
The background is already blurry (I used a large aperture on a DSLR).
Next, I transferred the photo to my iPhone and edited it.
- I cropped it to square (ready for Instagram).
- I made the background darker, as Fish is pale.
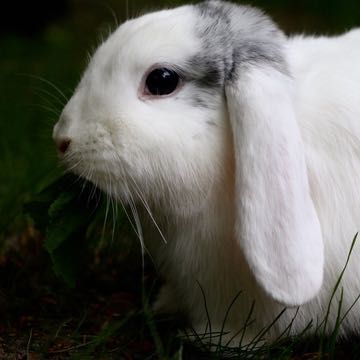
I did this simply by changing the ‘shadows’ settings in Photo – if you’re using an iPhone, you can do the same if you edit a photo.
And uploaded it to Instagram.
Conclusion
Just a few simple tips can make all the difference to your photos of your rabbits. Getting close and getting low down helps show off just how cute your bunny can be. Get snapping!
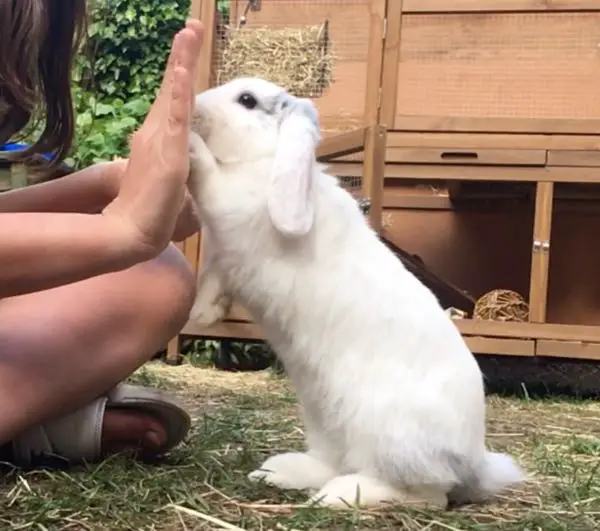
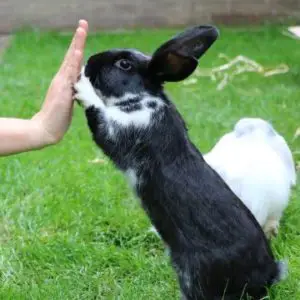
If you enjoy taking photos of your bunny, you might also be interested in teaching them tricks, like how to high five you or spin around. Take a look at our article on how to do this.